Last Updated: 4/19/22
This job aid details the information required for creating a Summary Proposal for submission of non-System-to-System (S2S) proposals.
WHO:
- Department/College Administrators
- Principal Investigators
WHEN:
- Creating a proposal that does not require system-to-system (Grants.gov) submission. Proposals submitted to for-profit entities, the National Science Foundation (NSF), National Aeronautics and Space Administration (NASA), etc. will submit summary proposals rather than submitting system-to-system through KR.
HOW:
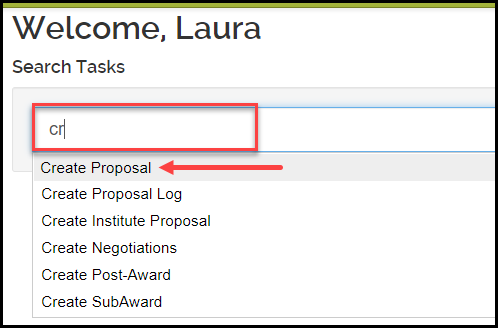
- From the Welcome screen, start typing create proposal and select the Create Proposal option from the dropdown
- You are now in a new Proposal Development (PD) document with the Create Proposal screen displayed
Basics Option
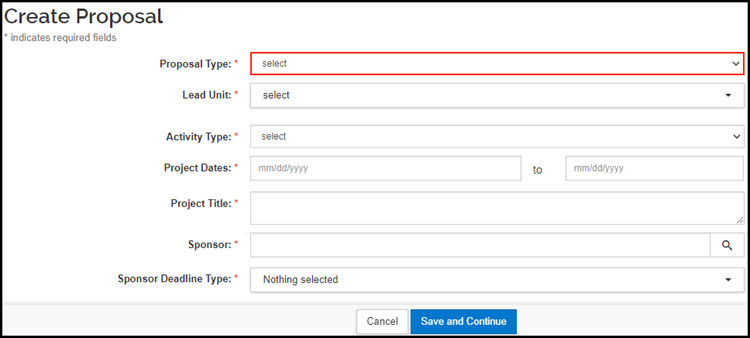
- Complete the required information in order to create and save the PD document
- Proposal Type – Select the appropriate Proposal Type from the dropdown list. Definitions of the Proposal Types can be found on the Prepare Proposal Development Document webpage.
- Lead Unit – Select the Lead Unit for the proposal from the dropdown list. If you only have access to add proposals for one unit, the unit will automatically be displayed in this field. This field cannot be edited once the proposal has been saved and a Proposal number has been assigned.
- Activity Type - Select the appropriate Activity Type from the dropdown list. Definitions of the Activity Types can be found on the Prepare Proposal Development Document webpage.
- Project Dates – Enter the project period start and end dates.
- Project Title – This is the official proposal title that matches the proposal to be submitted to the sponsor. If you do not know the title at the time you are creating the PD document, enter a placeholder that you will edit with the final proposal title prior to routing.
- Sponsor – Start typing the direct sponsor’s name, acronym, or Sponsor Code and select the appropriate sponsor from the dropdown list that appears. You can also use the search icon to search for the correct direct sponsor. If the sponsor has not been added to the Sponsor Table, you can request it by navigating to the Forms and Templates webpage on the SPA website, and clicking on the Adding Sponsors link within the Kuali Research System section. As a placeholder for the sponsor, enter 999999, which is the TBN sponsor code.
- Sponsor Deadline Type – Select “No Deadline Date” if there is no official deadline for the proposal submission. Select “Deadline Date” if there is a deadline for the proposal submission.
- Sponsor Deadline Date – This field appears and becomes required if “Deadline Date” was selected as the Sponsor Deadline Type. Enter the official deadline date provided by the sponsor. This field should NOT be used to enter a target date for submission.
- Click Save and Continue; a Proposal number will be assigned to the Proposal Development document, and a list of Options and Suboptions will display on the left-hand side of the screen.
NOTE: Once the Proposal number is assigned, contact your OSP Proposal Team or Business Connect representative to inform them of the proposal submission and provide them with the Proposal number.

- Once a Proposal number is assigned, additional fields will display in the Proposal Details suboption:
- Prime Sponsor Code – Add the sponsor code for the prime source of funding, if applicable
- Keywords – Add any applicable keywords for the proposal. If the project involves International Activities, the applicable Country or Region must be added as a Keyword.
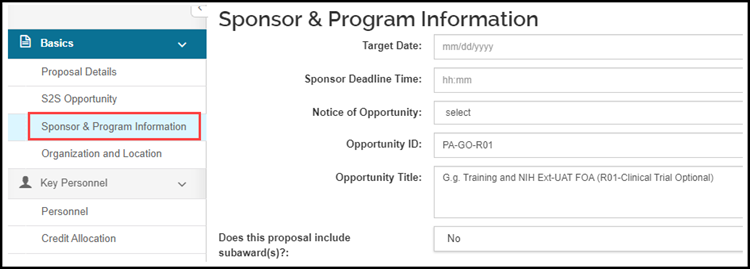
- Click on the Sponsor & Program Information suboption and complete the following fields, if applicable:
- Target Date, if there is no sponsor deadline date, but there is a date that you’d like to submit by
- Sponsor Deadline Time, if outside of the typical 5pm EST
- Opportunity ID – this field represents the solicitation number
- Does this proposal include subaward(s)?
Key Personnel Option
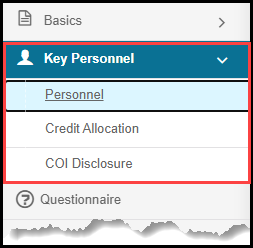
- Click on the Key Personnel option, and then click the Personnel sub option.
- Click the Add Personnel button to search for and add an individual to the Key Personnel tab. One person must be added with the Principal Investigator role.
- Complete the Credit Allocation suboption, making sure all Unit Total lines and Investigator lines add up to 100%.
Questionnaire Option
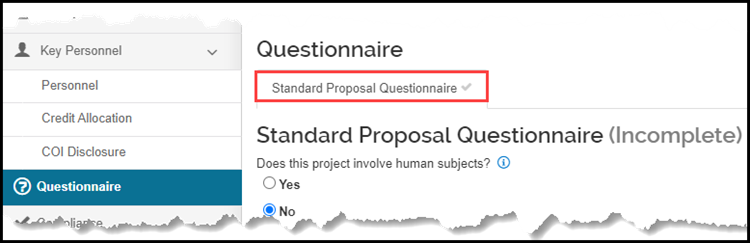
- Click on the Questionnaire option and answer all of the questions on the Standard Proposal Questionnaire tab.
Compliance Option
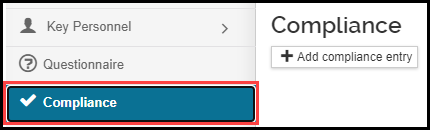
- Click the Add compliance entry button to indicate that the project involves human subjects, animals, international activities, additional space/renovation, URO, COI – BOT Review or export-controlled information, if known at the time of proposal.
Attachments Option
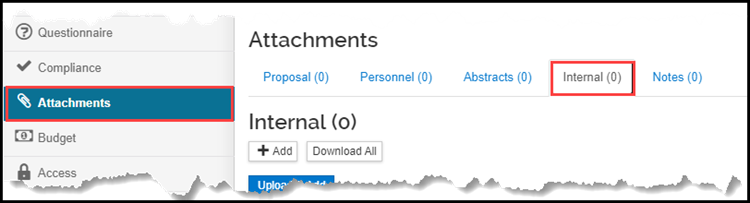
- Click on the Internal tab. At a minimum attach the scope of work, detailed budget (if not creating the detailed budget using the KR Budget module), budget justification, any sub-recipient commitment forms, and other supporting documentation [Please note, caution should be exercised when attaching documentation subject to a confidential disclosure agreement (CDA) or material transfer agreement (MTA)]
Budget Option
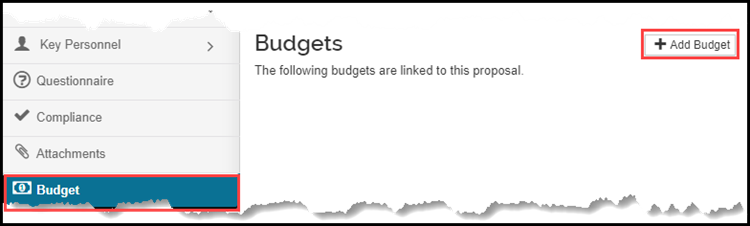
- Click the Add Budget button in the Budget Option. Within the pop-up, enter a budget name, and click the radio button next to either the Detailed or Summary budget.
NOTE: The remaining instructions are for adding a Summary budget. If you would like to create a Detailed budget in KR, view the related job aids and videos for assistance.
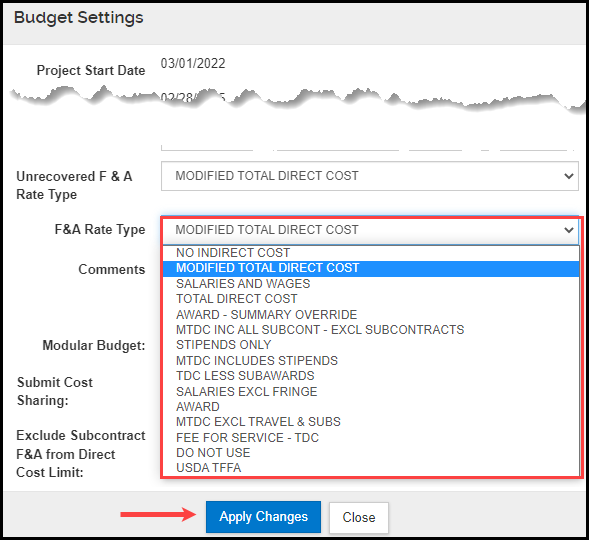
- Click on Budget Settings within the row along the top of the Budget document. Once the pop-up appears, select the correct F&A Rate Type from the dropdown and click the Apply Changes button.
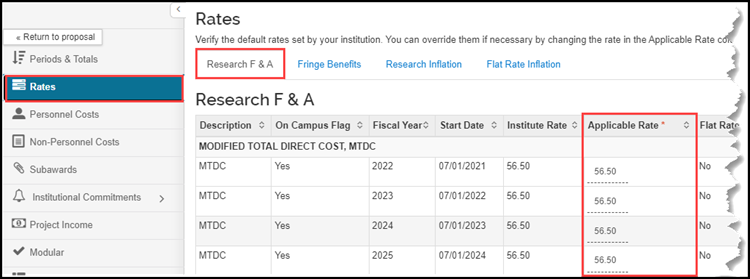
- Click the Rates option, then click on the Research F & A tab
- Verify the correct rate for the budget is reflected in the Applicable Rates column, and if not, edit the percentage for each fiscal year.
- Click back to the Periods & Totals Option
- Adjust the Period Start and End Dates in the Periods & Totals section, if necessary
- For each budget period, enter the Direct Cost, F&A Cost and required Cost Sharing (if applicable) amounts under the appropriate heading.
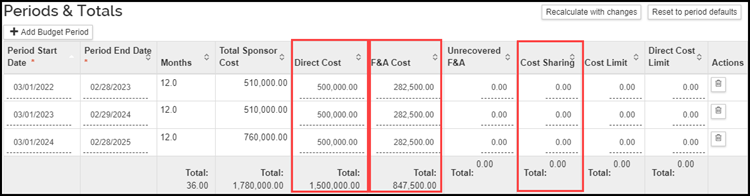
- The application will automatically calculate the Total Sponsor Cost for each budget period as well as the Total Direct Cost, F&A Cost, and Cost Sharing (if applicable) amounts when you click save or Recalculate with changes
- Click the Return to proposal button located in the top left-hand corner
- Under the Actions column, click on the Action drop down and select Include for Submission.

- Click save
- Provide your final budget via email to either your OSP Proposal Team or Business Connect for their review. Following review and approval, either OSP or BC will update the budget status from Not Approved to Approved.
Supplemental Information Option
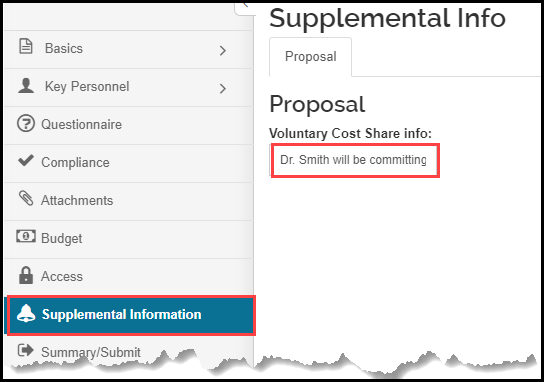
- Enter any voluntary committed cost sharing included in the proposal.
Summary/Submit Option
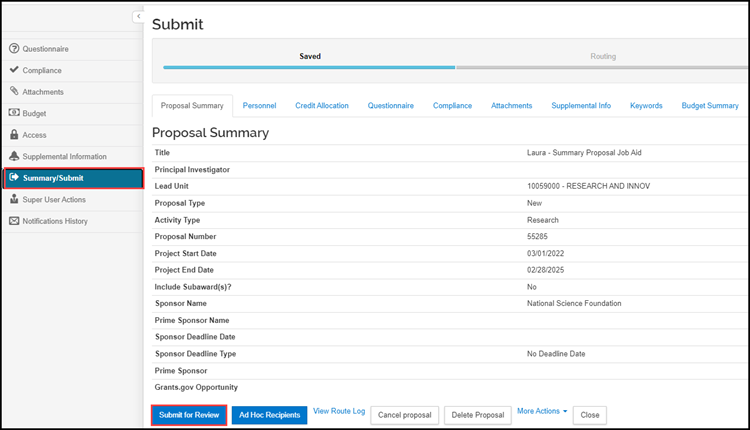
- Click the Submit for Review button at the bottom of the page, note that Data Validations will automatically engage and present any errors or warnings.
- Fix any errors in the proposal, if applicable. Once all errors are corrected, click the Submit for Review button to start the institutional approval process

